

Imagine a spoonful of pure, golden sunshine that melts on your tongue like a velvet cloud. This Dairy-Free Ninja Creami Banana Ice Cream changes everything you know about healthy desserts. You start with humble, spotty bananas and end up with a lush, decadent treat that rivals any high-end gelateria.
The texture is impossibly smooth, swirling with natural sweetness and a refreshing chill that wakes up your palate. Every bite feels like a celebration of fresh fruit and innovative kitchen magic. You deserve a treat that nourishes your body while making your taste buds dance with joy. This Dairy-Free Ninja Creami Banana Ice Cream is the ultimate hack for anyone craving a rich, creamy experience without any of the dairy or refined sugars.
Why You’ll Love This Dairy-Free Ninja Creami Banana Ice Cream
- The Dairy-Free Ninja Creami Banana Ice Cream offers a texture so velvety and thick that you will forget it is made entirely from fruit and plants.
- You only need a few wholesome ingredients to create a professional-grade dessert right in your own kitchen with zero fuss.
- This recipe avoids all refined sugars, relying instead on the deep, caramelized sweetness of ripe bananas and a touch of pure maple syrup for a healthy lifestyle.
- The process is incredibly satisfying, watching a solid block of frozen fruit transform into a swirling masterpiece of Dairy-Free Ninja Creami Banana Ice Cream.
Ingredients You’ll Need
Quality is the heartbeat of this recipe. To achieve the most luxurious Dairy-Free Ninja Creami Banana Ice Cream, you must select bananas at the peak of their sweetness.
Look for skins that are covered in brown spots—this indicates the starches have converted into natural sugars, providing that deep, honey-like flavor and a soft, blendable texture. For the creamy element, full-fat canned coconut milk provides a richness that mimics heavy cream, while vanilla bean paste adds those gorgeous little black flecks and a floral aroma that elevates the entire experience.
- 3 Large Ripe Bananas: The riper they are, the sweeter and creamier your Dairy-Free Ninja Creami Banana Ice Cream will be.
- 1 Cup Full-Fat Coconut Milk: This provides the essential healthy fats for a luscious mouthfeel.
- 2 Tablespoons Pure Maple Syrup: A natural sweetener that adds a hint of caramel notes.
- 1 Teaspoon Vanilla Bean Paste: For a concentrated burst of aromatic flavor and visual elegance.
- 1/4 Teaspoon Sea Salt: A tiny pinch to balance the sweetness and brighten the fruit notes.
Substitutions & Variations
Note: This video is for demonstration purposes and may use a slightly different method.
The beauty of the Dairy-Free Ninja Creami Banana Ice Cream lies in its versatility. If you prefer a lighter version, you can swap the coconut milk for unsweetened cashew milk or almond milk. Cashew milk, in particular, maintains a wonderful creaminess without the distinct coconut flavor.
For those who want to experiment with sweeteners, raw honey is a fantastic alternative to maple syrup, offering a different floral profile. If you are watching your glycemic index, monk fruit sweetener works beautifully to keep this Dairy-Free Ninja Creami Banana Ice Cream light and healthy.
Do you want to add some crunch? After the initial spin, consider adding a handful of toasted walnuts or cacao nibs as a “mix-in.” The contrast between the silky banana base and the earthy, crunchy nibs is absolutely divine.
You could even swirl in a tablespoon of natural almond butter for a “monkey business” style treat that feels incredibly indulgent yet stays perfectly within your healthy eating goals. This Dairy-Free Ninja Creami Banana Ice Cream is a blank canvas for your culinary creativity.
If you’re interested in exploring even more dairy-free treats, check out our recipe for Dairy-Free Homemade Pineapple Popsicles. They offer a refreshing twist and are just as versatile as the Ninja Creami Banana Ice Cream!
Step-by-Step Instructions
- Prepare the Base: In a medium bowl or a high-speed blender, combine your ripe bananas, coconut milk, maple syrup, vanilla bean paste, and sea salt. Blend or mash until the mixture is completely smooth and vibrant. You want a consistent, pale yellow liquid that looks like a thick milkshake.
- Fill the Pint: Carefully pour the mixture into your Ninja Creami pint container. Ensure you do not exceed the “max fill” line, as the mixture will expand slightly as it freezes. The Dairy-Free Ninja Creami Banana Ice Cream needs that little bit of breathing room.
- Freeze Solid: Place the lid on the pint and set it on a level surface in your freezer. You must wait a full 24 hours. This patience is key! The Ninja Creami technology works by shaving micro-layers off a rock-solid block to create that signature Dairy-Free Ninja Creami Banana Ice Cream texture.
- The First Spin: Remove the pint from the freezer and take off the lid. Insert it into the outer bowl, lock the lid, and place it into the machine. Select the “Lite Ice Cream” function. Listen to the satisfying hum as the blade works its magic.
- Check and Re-spin: If the mixture looks a bit crumbly after the first spin, don’t worry! This is common with dairy-free bases. Simply add one tablespoon of dairy-free milk to the center and select the “Re-spin” button. This second pass will turn your Dairy-Free Ninja Creami Banana Ice Cream into a glossy, smooth dream.
- Serve Immediately: Scoop the Dairy-Free Ninja Creami Banana Ice Cream into chilled bowls. Observe how it holds its shape yet starts to soften slightly at the edges, creating a luscious sauce as it sits.
Pro Tips for Success
To get the most out of your Dairy-Free Ninja Creami Banana Ice Cream, always ensure your freezer is set to a very cold temperature. If the pint isn’t frozen solid all the way through, the texture might turn out more like soft serve than traditional ice cream. Another secret is the “leveling” tip.
When you freeze your mixture, make sure the top is perfectly flat. If there is a “hump” in the middle, the Creami blade might struggle to shave the layers evenly, which could affect the longevity of your machine and the consistency of the Dairy-Free Ninja Creami Banana Ice Cream.
Always taste your mixture before freezing. Since bananas vary in sweetness based on their size and ripeness, you might want to add an extra teaspoon of maple syrup. Remember that flavors tend to mute slightly once frozen, so making the base a tiny bit sweeter than you think you need will result in a perfectly flavored Dairy-Free Ninja Creami Banana Ice Cream.
Finally, if you find yourself with leftovers, remember that the Ninja Creami process is designed for single-session eating. If you freeze it again, it will return to a solid block, and you will need to spin it once more to regain that ethereal texture.
To enhance your Dairy-Free Ninja Creami Banana Ice Cream experience, consider trying our Dairy-Free Baked Healthy Peach Cobbler. This warm dessert pairs beautifully with the cold, creamy texture of the banana ice cream.
Storage & Reheating Tips
The Dairy-Free Ninja Creami Banana Ice Cream is at its absolute best the moment it leaves the machine. However, if you cannot finish the entire pint, simply smooth down the top so it is level once more and place it back in the freezer. When you are ready for your next treat, you don’t need to thaw it.
Just put it back into the Ninja Creami and hit the “Lite Ice Cream” or “Re-spin” button again. This will restore the Dairy-Free Ninja Creami Banana Ice Cream to its original, velvety glory.
Avoid leaving the pint on the counter to “thaw” like traditional store-bought ice cream. Because this recipe lacks the stabilizers and high sugar content of commercial brands, it won’t melt in the same way; it will simply become icy if it thaws and refreezes without being processed by the machine. Treat your Dairy-Free Ninja Creami Banana Ice Cream with care, and it will reward you with freshness every single time.
What to Serve With This Recipe
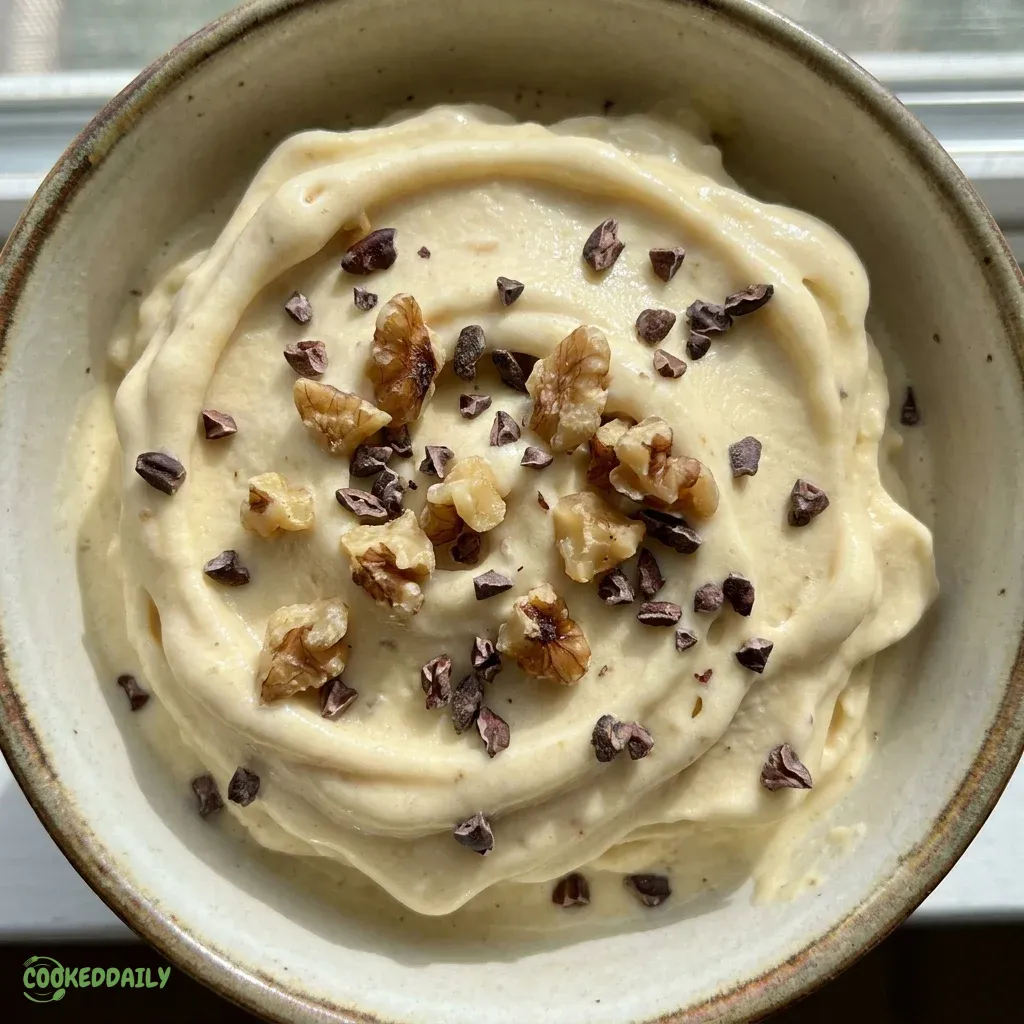
While a bowl of Dairy-Free Ninja Creami Banana Ice Cream is a masterpiece on its own, you can elevate the experience with some healthy, vibrant pairings. I love serving a scoop of this alongside a warm, grain-free berry crumble.
The contrast of the cold, creamy banana with the tart, bubbling berries is a sensory delight. You can also top it with a drizzle of homemade almond butter sauce—just whisk together almond butter, a splash of coconut oil, and a touch of maple syrup for a glossy, rich finish that hardens slightly on the cold Dairy-Free Ninja Creami Banana Ice Cream.
For a refreshing afternoon snack, try pairing a small scoop with a side of fresh, sliced strawberries and a sprig of mint. The brightness of the berries cuts through the richness of the coconut milk beautifully.
If you’re feeling adventurous, sprinkle a little cinnamon and some toasted coconut flakes over the top. The golden color of the flakes against the pale Dairy-Free Ninja Creami Banana Ice Cream is visually stunning and adds a wonderful crunch that makes every bite an adventure in texture.
For a wholesome pairing with your Dairy-Free Ninja Creami Banana Ice Cream, try making Dairy-Free Coconut Almond Protein Balls. These energy-packed snacks complement the ice cream while keeping your dessert healthy and satisfying.
FAQs
Can I make this recipe without a Ninja Creami?
While the Ninja Creami is specifically designed to create this unique micro-shaved texture, you can technically freeze the mixture in ice cube trays and blend them in a high-powered blender. However, you won’t achieve the exact same level of silkiness that the Dairy-Free Ninja Creami Banana Ice Cream is famous for. The Creami technology really is a game-changer for dairy-free frozen desserts.
Is this recipe suitable for a Keto diet?
Bananas are naturally high in carbohydrates and sugars, so this Dairy-Free Ninja Creami Banana Ice Cream is generally not considered Keto-friendly. However, it is an excellent choice for those following a Paleo, Vegan, or Whole-Food Plant-Based lifestyle. If you need a Keto option, you could try a similar base using avocado and monk fruit instead of bananas.
Why did my ice cream turn out crumbly?
Don’t panic! Crumbliness is very common with dairy-free recipes because they lack the heavy fats found in dairy cream. If your Dairy-Free Ninja Creami Banana Ice Cream looks like snow or pebbles after the first spin, simply add a splash of dairy-free milk and use the “Re-spin” function. This will emulsify the ingredients and produce that professional, creamy finish you desire.
Dairy-Free Ninja Creami Banana Ice Cream is a healthy dessert option made entirely from natural ingredients, focusing on ripe bananas for sweetness. This dessert falls within the broader category of healthy cooking, which emphasizes nutritional ingredients and alternatives to traditional dairy products, leading towards a healthier lifestyle, as noted in discussions about healthy cooking.
Nutrition Information (per serving)
This recipe makes approximately 2 servings of Dairy-Free Ninja Creami Banana Ice Cream. It is packed with potassium, healthy fats, and natural fiber, making it a fantastic alternative to traditional processed desserts.
| Calories | 245 kcal |
| Total Fat | 12g |
| Saturated Fat | 10g |
| Sodium | 150mg |
| Total Carbohydrates | 36g |
| Dietary Fiber | 4g |
| Sugars | 22g (natural) |
| Protein | 2g |

Dairy-Free Ninja Creami Banana Ice Cream
- Total Time: 30 mins
- Yield: 2 servings 1x
- Diet: Dairy Free, Vegan
Description
This Dairy-Free Ninja Creami Banana Ice Cream is a rich, creamy dessert made from ripe bananas and coconut milk, sweetened with pure maple syrup and enhanced with vanilla bean paste. It offers a velvety texture and natural sweetness, making it a perfect healthy treat.
Ingredients
3 Large Ripe Bananas
1 cup Full-Fat Coconut Milk
2 tablespoons Pure Maple Syrup
1 teaspoon Vanilla Bean Paste
1/4 teaspoon Sea Salt
Instructions
- In a medium bowl or high-speed blender, combine ripe bananas, coconut milk, maple syrup, vanilla bean paste, and sea salt. Blend until smooth
- Pour the mixture into a Ninja Creami pint container, ensuring not to exceed the 'max fill' line
- Freeze the container for 24 hours
- After freezing, remove from the freezer, insert into the Ninja Creami, and select 'Lite Ice Cream' functio
- If the ice cream looks crumbly after the first spin, add one tablespoon of dairy-free milk and select 'Re-spin'
- Scoop the ice cream into chilled bowls and serve
Notes
Ensure your freezer is set to a very cold temperature for the best texture.
Taste the mixture before freezing; add more maple syrup if needed for sweetness.
If you have leftovers, smooth the top and freeze again, using 'Re-spin' for best results.
- Prep Time: 20 mins
- Cook Time: 10 mins
- Category: Dessert
- Method: Freezing
- Cuisine: American
Nutrition
- Serving Size: 1 cup
- Calories: 245 kcal
- Sugar: 22g
- Sodium: 150mg
- Fat: 12g
- Saturated Fat: 10g
- Unsaturated Fat: unknown
- Trans Fat: 0g
- Carbohydrates: 36g
- Fiber: 4g
- Protein: 2g
- Cholesterol: 0mg