

Finding a breakfast that balances health, flavor, and efficiency often feels impossible. These Low-Sugar Raspberry Chia Pudding Cups solve that problem by offering a creamy, nutrient-dense meal that requires zero actual cooking. I value my time, and I refuse to spend my mornings cleaning up a mountain of pans or feeling a sugar crash by noon.
These Low-Sugar Raspberry Chia Pudding Cups rely on the natural gelling power of chia seeds to create a satisfying, thick texture that feels like a treat. The tartness of the raspberries cuts through the richness of the milk perfectly. If you need a foolproof, grab-and-go option, this recipe delivers exactly what you need without the fluff.
Why You’ll Love This Recipe
- Minimal Effort: You only need five minutes of active prep time to assemble these Low-Sugar Raspberry Chia Pudding Cups.
- Sustained Energy: The combination of fiber and healthy fats keeps you full for hours without refined sugar.
- Zero Cleanup: You mix and eat from the same container, which fits my minimalist lifestyle perfectly.
- Meal-Prep Friendly: These cups stay fresh in the fridge for days, making your busy mornings significantly smoother.
Ingredients You’ll Need
Quality ingredients make a massive difference when the recipe is this simple. To ensure your Low-Sugar Raspberry Chia Pudding Cups taste great, choose fresh or high-quality frozen raspberries and a creamy, unsweetened nut milk. I prefer using monk fruit or a small amount of maple syrup to keep the glycemic index low while maintaining a pleasant sweetness.
| Ingredient | Amount | Purpose |
|---|---|---|
| Chia Seeds | 1/4 Cup | Provides the structure and thick, pudding-like consistency. |
| Unsweetened Almond or Coconut Milk | 1 Cup | The liquid base that hydrates the seeds for creaminess. |
| Fresh or Frozen Raspberries | 1/2 Cup | Adds tart flavor and natural vibrant color. |
| Monk Fruit Sweetener or Maple Syrup | 1-2 Teaspoons | Provides sweetness without the inflammatory effects of refined sugar. |
| Vanilla Extract | 1/2 Teaspoon | Enhances the overall flavor profile of the pudding. |
| Pinch of Sea Salt | 1 Pinch | Balances the sweetness and brightens the raspberry notes. |
Substitutions & Variations
Note: This video is for demonstration purposes and may use a slightly different method.
I believe in using what you have on hand. If you want to customize your Low-Sugar Raspberry Chia Pudding Cups, you can easily swap ingredients without ruining the texture. Efficiency means being flexible with your pantry.
For instance, if you do not have almond milk, coconut milk from a carton works exceptionally well and adds a tropical flair. Consequently, the fat content will be slightly higher, which can actually help with satiety.
If raspberries are out of season or too expensive, feel free to use blackberries or strawberries. Strawberries are slightly sweeter, so you might want to reduce the added monk fruit. To add more protein to your Low-Sugar Raspberry Chia Pudding Cups, stir in a tablespoon of collagen peptides or a clean, plant-based protein powder.
Just ensure you add an extra splash of milk to account for the powder’s absorption. For a nutty crunch, top the finished cups with slivered almonds or pumpkin seeds right before eating.
If you’re looking to maintain flexibility in your recipes, check out this guide on Low-Sugar Chocolate Chip Banana Blondies. They’ll show you how to customize sweet treats using pantry staples.
Step-by-Step Instructions
- Mash the Raspberries: Place your raspberries in a small bowl or directly into your glass jars. Use a fork to gently mash them until they release their juices. This ensures the fruit flavor permeates every bite of your Low-Sugar Raspberry Chia Pudding Cups.
- Combine Liquids and Sweetener: Pour the unsweetened milk, vanilla extract, and monk fruit sweetener over the mashed berries. Stir well to incorporate the flavors.
- Add the Chia Seeds: Whisk in the chia seeds and the pinch of sea salt. I find that using a small whisk or a fork works best to prevent the seeds from clumping together.
- The First Rest: Let the mixture sit for about 5 to 10 minutes at room temperature. This is a crucial step for the perfect Low-Sugar Raspberry Chia Pudding Cups.
- The Second Stir: After the short rest, stir the mixture again. This breaks up any settled seeds and ensures a uniform texture throughout the cup.
- Chill and Set: Cover the jars and place them in the refrigerator for at least 4 hours, though overnight is ideal for the thickest consistency.
Pro Tips for Success
To achieve the ultimate texture in your Low-Sugar Raspberry Chia Pudding Cups, you must focus on the hydration process. Chia seeds can sometimes settle at the bottom of the jar, creating a rubbery layer. I always emphasize the double-stir technique mentioned in the instructions.
Stirring once, waiting five minutes, and stirring again guarantees a smooth, consistent gel. If you prefer a completely smooth texture similar to traditional snack puddings, you can blend the entire mixture in a high-speed blender before chilling.
Another tip involves the temperature of your liquid. Using room-temperature milk helps the chia seeds begin the gelling process faster than ice-cold milk. Furthermore, if you find your Low-Sugar Raspberry Chia Pudding Cups are too thick the next morning, simply stir in an extra tablespoon of milk to reach your desired consistency.
Precision matters, but so does personal preference. Always taste your mixture before the final chill to ensure the sweetness level meets your needs.
For even more tips on achieving a smooth texture in your snacks, see my post on the Diabetic-Friendly Low-Sugar Green Smoothie. This approach to hydration can enhance your enjoyment of any pudding.
Storage & Reheating Tips
Storage is where these Low-Sugar Raspberry Chia Pudding Cups truly shine for the busy professional. Use airtight glass containers or mason jars to keep the pudding fresh. They will easily last for 5 days in the refrigerator.
I usually make a batch on Sunday evening so my breakfasts are sorted through Friday. The flavors actually deepen as they sit, making the last jar just as delicious as the first.
While most people enjoy these cold, you can actually eat them warm. If you prefer a cozy breakfast during winter, heat your Low-Sugar Raspberry Chia Pudding Cups in a small saucepan over low heat for 2-3 minutes. Alternatively, microwave them for 30-45 seconds.
Do not boil them, as this can change the texture of the seeds. I personally prefer them cold, as the refreshing chill highlights the tartness of the raspberries.
What to Serve With This Recipe
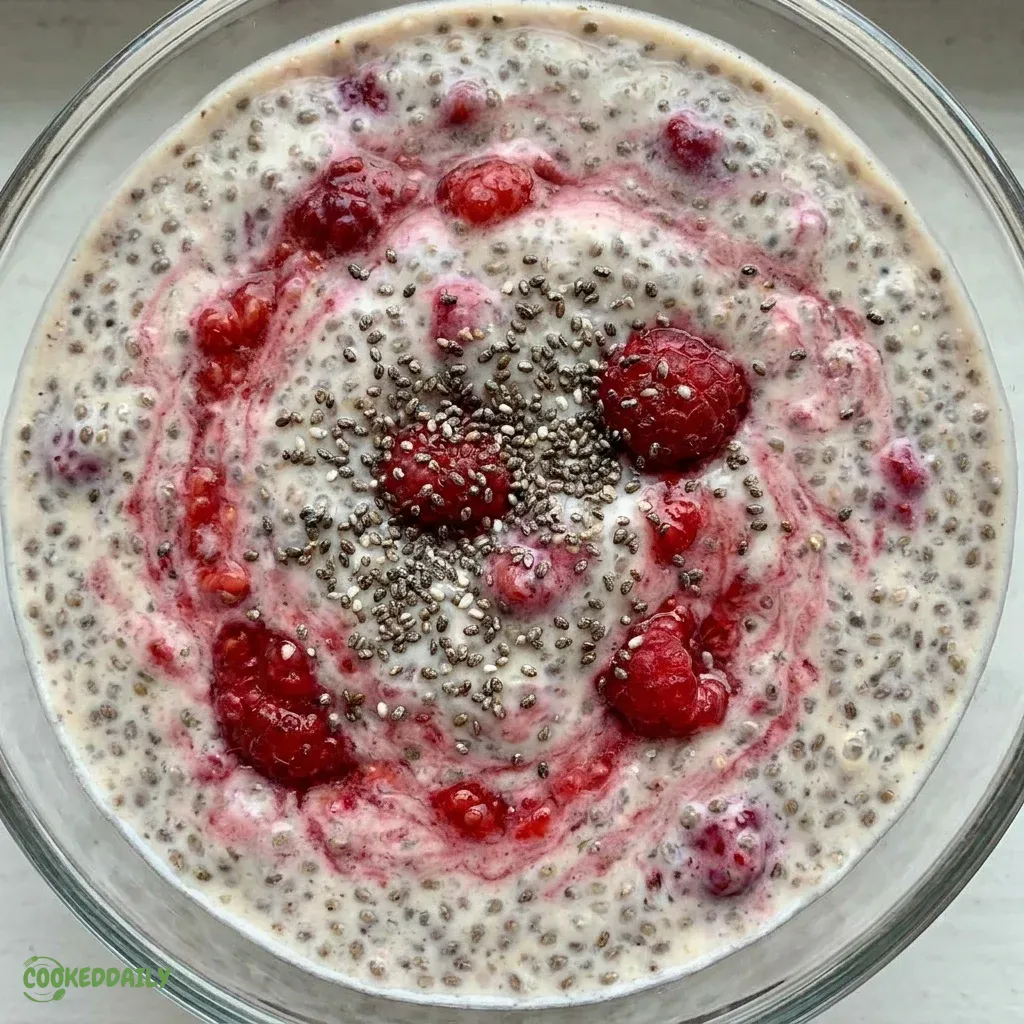
Since these Low-Sugar Raspberry Chia Pudding Cups are relatively light, you might want to pair them with something savory or high in protein to round out your morning. I often serve mine alongside a couple of hard-boiled eggs for a complete, minimalist meal. The eggs provide a savory contrast to the fruity pudding. Another great option is a side of roasted walnuts or pecans, which add a much-needed crunch and healthy fats.
If you are eating these as a snack or a light lunch, consider pairing them with a small green salad topped with extra virgin olive oil and lemon juice. The acidity of the salad complements the creaminess of the pudding.
For those who want to stick to a breakfast theme, a side of seared turkey bacon or avocado slices provides the salty, fatty elements that make a meal feel truly satisfying. Always aim for balance without adding unnecessary complexity to your kitchen routine.
Looking for a complement to your Low-Sugar Raspberry Chia Pudding Cups? Consider pairing them with my delicious Low-Sugar Blueberry Breakfast Cereal Bars for a balanced meal!
FAQs
Can I use frozen raspberries for these cups?
Yes, frozen raspberries work perfectly in Low-Sugar Raspberry Chia Pudding Cups. In fact, they often release more juice than fresh berries once thawed, which can enhance the color and flavor of the pudding. Simply mash them while they are still slightly frozen or let them thaw for a few minutes before starting the recipe.
Why is my chia pudding watery?
If your Low-Sugar Raspberry Chia Pudding Cups are watery, you likely didn’t use enough chia seeds or didn’t let them sit long enough. Chia seeds need time to absorb the liquid. Ensure you use a 1:4 ratio of seeds to liquid and let the pudding sit for at least four hours. If it is still thin, stir in an extra teaspoon of seeds and wait another hour.
Is this recipe keto-friendly?
Absolutely. These Low-Sugar Raspberry Chia Pudding Cups are excellent for a ketogenic diet. By using monk fruit as the sweetener and unsweetened nut milk, you keep the net carb count very low. Chia seeds are also high in fiber, which reduces the total impact on blood sugar levels, making this a staple for low-carb enthusiasts.
These delightful Low-Sugar Raspberry Chia Pudding Cups utilize the health benefits of chia seeds, which are rich in omega-3 fatty acids and fiber. For more on the advantages of incorporating seeds into your diet, read about chia seeds.
Nutrition Information (per serving)
This data reflects one serving of the Low-Sugar Raspberry Chia Pudding Cups using unsweetened almond milk and monk fruit sweetener. These values are estimates and can vary based on the specific brands of ingredients you choose to use.
| Nutrient | Amount |
|---|---|
| Calories | 185 kcal |
| Total Fat | 12g |
| Saturated Fat | 1.5g |
| Sodium | 160mg |
| Total Carbohydrates | 18g |
| Dietary Fiber | 13g |
| Net Carbohydrates | 5g |
| Sugars | 2g |
| Protein | 6g |
In summary, these Low-Sugar Raspberry Chia Pudding Cups are a testament to the fact that healthy eating doesn’t have to be complicated. By focusing on high-quality ingredients and a simple preparation method, you create a meal that serves your body and your schedule. The minimalist approach focuses on the “why,” and the “why” here is clear: better health through better efficiency.
Stop overthinking your breakfast and start prepping these Low-Sugar Raspberry Chia Pudding Cups today. You will appreciate the extra time in your morning and the steady energy throughout your afternoon.
Transitioning to a diet free of refined sugar and inflammatory oils is the best gift you can give your future self. I have found that recipes like these Low-Sugar Raspberry Chia Pudding Cups make the transition effortless because they taste like a reward rather than a restriction.
Whether you are a busy parent, a professional with a long commute, or someone who simply hates doing dishes, this recipe is for you. Enjoy the simplicity of Low-Sugar Raspberry Chia Pudding Cups and the peace of mind that comes with a well-prepped kitchen.
Print
Low-Sugar Raspberry Chia Pudding Cups
- Total Time: 4 hrs 5 mins
- Yield: 2 servings 1x
- Diet: Gluten Free, Keto
Description
These Low-Sugar Raspberry Chia Pudding Cups offer a creamy, nutrient-dense meal that requires zero actual cooking. They provide sustained energy and are perfect for busy mornings.
Ingredients
1/4 cup Chia Seeds
1 cup Unsweetened Almond or Coconut Milk
1/2 cup Fresh or Frozen Raspberries
1–2 teaspoons Monk Fruit Sweetener or Maple Syrup
1/2 teaspoon Vanilla Extract
1 pinch Sea Salt
Instructions
- Mash the Raspberries in a bowl or jar until they release juices
- Combine the unsweetened milk, vanilla extract, and sweetener with the mashed berries. Stir well
- Whisk in chia seeds and pinch of salt to avoid clumping
- Let the mixture sit for 5 to 10 minutes
- Stir the mixture again to ensure uniform texture
- Cover and refrigerate for at least 4 hours or overnight to set
Notes
Make sure to use quality ingredients for the best results. Customize the pudding by using different berries if raspberries are not available.
- Prep Time: 5 mins
- Cook Time: 0 mins
- Category: Breakfast
- Method: No-Cooking
- Cuisine: American
Nutrition
- Serving Size: 1 cup
- Calories: 185 kcal
- Sugar: 2g
- Sodium: 160mg
- Fat: 12g
- Saturated Fat: 1.5g
- Unsaturated Fat: 10.5g
- Trans Fat: 0g
- Carbohydrates: 18g
- Fiber: 13g
- Protein: 6g
- Cholesterol: 0mg